This is the documentation for an older version of Folio and has been moved to the Tempo instance.
Please view the Folio Category in the Tempo Products Wiki Categories for all versions of Folio's Documentation.
Portfolio Team
- FrancoisL (Deactivated)
- JeanH (Deactivated)
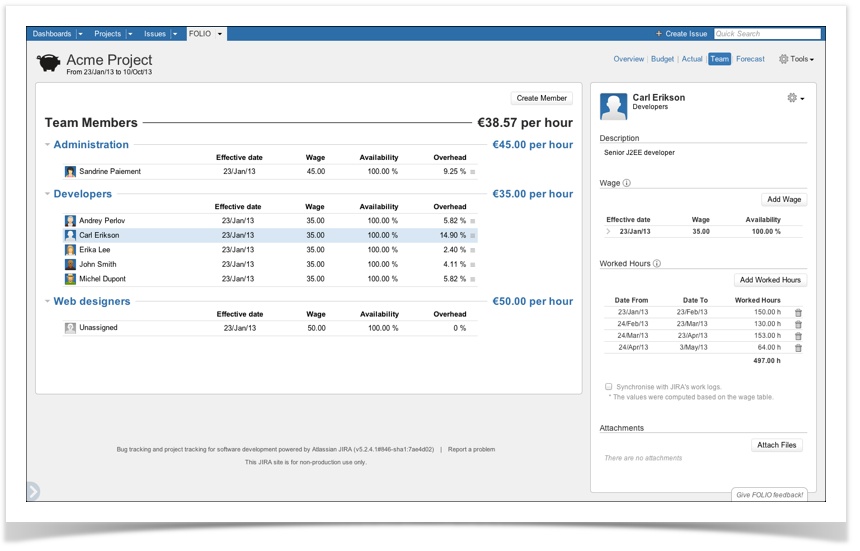
FOLIO introduces the notion of Team in JIRA. Its main goal is to identify the individuals assigned to the project and capture their wages and availability over the course of the project; both current and future. Project managers plan work assignment, see who is currently working on the project and what percentage of that persons time is dedicated to the project. Not only that, they can also manage yet to be filled positions.
Team MembersTeam members are JIRA users that actively work and record hours on a portfolio's scope.
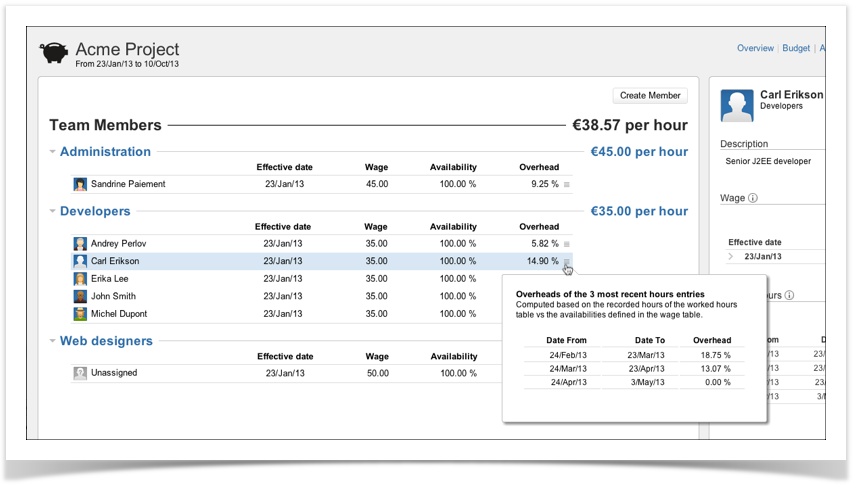
Team Member OverheadIn order to see how efficiently the resources are used, FOLIO adds the notion of overhead. This one indicates the percentage of hours that were not credited to the portfolio's scope for a specific member. It is computed based on the entries of the worked hours table vs the availabilities defined in the wage table, both located in the right hand side column. You can also inspect the tendency of a member's overheads based on the 3 last entries of the worked hours table by clicking the ( The overhead computation e.g. :
The overhead will than be : (80hours worked - 70 hours logged) X 100 / 80 hours worked = 12.5 % Note that clicking the (
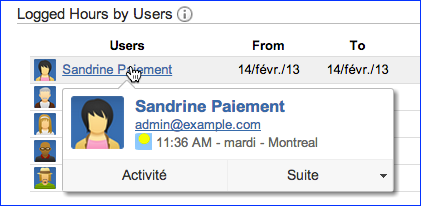
Users vs Logged HoursTo help you build your portfolio's team faster, FOLIO introduces the work logs inspector. This one will list all the users that have logged hours on one or more issues part of the portfolio's scope and within its time frame. If not already a member of the team, you will be able to quickly add a user to your team by clicking on the ''+'' button. The work log inspector is accessible directly from the Clock icon within the team browser or by simply typing the keyboard shortcut "w". Note that FOLIO supports most timesheet add-ons such as Tempo.
Note that you can also add users that have been removed from JIRA since their worklogs are still associated to the JIRA issues.
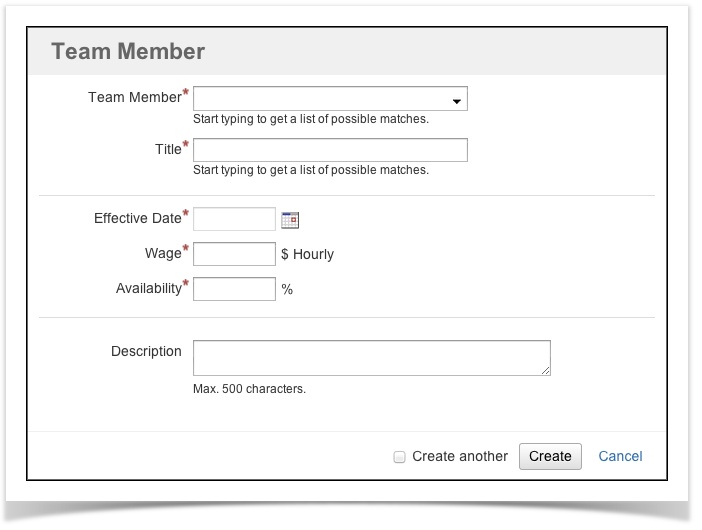
Adding a team memberTo create a team member, either click the Create Member button or hit the "a" (for add) shortcut key. The team member creation screen will be displayed.
When the above fields have been completed, click on the create button to save the information. Should you wish to create another team member, click on the shortcut Create another check box.
Edit team member’s information fields
Select an existing member to modify by clicking on it and then either click on the drop-down menu on the top-right part of the member details view (on righthand side of the screen) and select the Edit option or hit the "e" (for edit) shortcut key. This will bring up the Team member edition dialog.
Deleting a team memberSelect an existing team member to delete by clicking on it and then either click on the drop-down menu on the top-right part of the team member details view (on righthand side of the screen) and select the Delete option or hit the "d" (for delete) shortcut key. This will bring up a dialog to confirm team member deletion. Click the Delete button to confirm the deletion, or Cancel link to abort deletion. Deletion is permanent, thus make sure you really want to delete a team before proceeding. You can delete multiple team members at once by selecting multiple lines in the team (by pressing and holding the Control key while clicking the team members to delete). You can then delete the selected team members the same way you delete a single team member. Note that in this case, the deletion confirmation will inform you of how many members are about to be deleted.
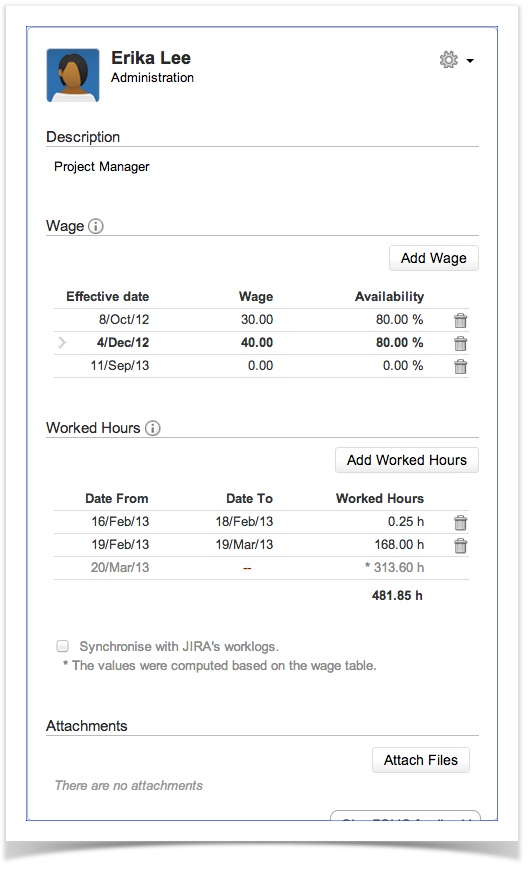
Team member’s detailed informationTo access team member’s information after the creation, select the name of the appropriate team member in the main screen and see the details on the right hand side column.
WageFOLIO adds the notion of wage in JIRA. The wage is a fixed regular payment, typically paid on a daily basis, made by an employer to an employee.
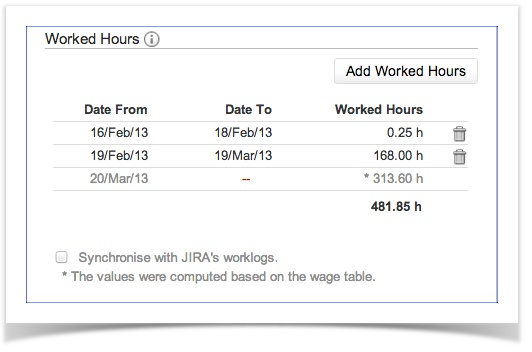
New wage When a new wage is required for a team member, click on the Add Wage button and complete the fields with the new information. Click outside the fields to save the new information. Delete a wage When a wage entry is not required or in error, click on the delete button and this line will disappear. Note that at least one line is required under the Wage section. When deleting a wage line, make sure the information in the effective date and availability fields is accurate. New availability When a new availability is required for a team member, click on the Add Wage button and complete the fields with the new information. Click outside the fields to save the new information. Delete availability When an availability is not required or in error, click on the delete button and this line will disappear. Note that at least one line is required under the Wage section. When deleting a line, make sure the information in the effective date and wage fields is accurate. How to report vacation, a disability? To report a team member vacation or disability period, update the wage section by indicating availability information at 0 % from/to date of the vacation/disability period. Team member with punctual involvement To report a team member punctual involvement, update the wage section by indicating availability information at 0% from/to date of the non involvement. Note that if a specific number of hours is logged for a team member, the total number of hours logged will be distributed through the project period. Worked HoursThe worked hours section information is automatically calculated as per the effective date and availability confirmed in the Wage section as well as per the work schedule set in the JIRA configuration.
Synchronize with JIRA's work logs Select "Synchronize with JIRA's work logs" if you want the team member worked hours to be taken directly from the work logged into JIRA. Note that from configuration screen you can set all team members to be synchronized with JIRA's work logs by default. New worked hours for a specific period When a team member has worked more or less than planned for a specific period of time, the number of hours can be override.In the Worked Hours section, click on the Add Worked Hours button and complete the fields with the new information. Click outside the fields to save the new information. The new number of worked hours will be equally distributed in the number of days included in the specific period. Update worked hours You can click on Date from, Date to or Worked Hours field if you want to update their values Note that the basic and planned information cannot be deleted from this section. (grayed out line with no garbage can) Delete worked hours entry When a worked hours entry is not required or in error, click on the delete button and this line will disappear. Note that the computed information cannot be deleted from this section (grayed out line with no garbage can). Attaching files to team memberYou can attach files to a team member or unassigned position in order to keep related documents handy (pay slips, resumes, job description, etc.). To attach files to a team position, select it and then click button Attach Files in team member details panel on the right. This will bring up a dialog where you can pick a file (or multiple files simultaneously, if your browser allows it) and enter an optional comment.
| Related pages: | ||||||||||||||||||||||||||||||||||||||||